Generic Luxury Sedan Stock Image
Home |Automotive Illustrations |Industrial Illustrations |Stock Illustration |Car Photography |Tutorials |Sitemap |Contact
Photoshop Layered File InstructionsGeneral File Description All of the major vehicle component systems in this file are located on separate layers. The file consists of 25 main layers and 5 auxiliary layers. The auxiliary, or extra layers, are labeled "NOT USED" and are found below ("_END_"). It is important not to alter the layer order of the file, as this can result in unintended, and/or undesirable effects. Layers can be turned off, tinted, or faded back as desired, but they MUST remain in their descending numerical order. 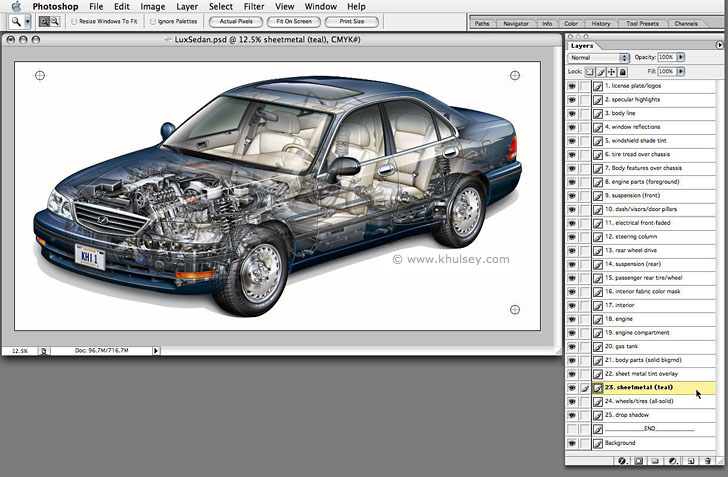 Sheet Metal/Exterior Paint Re-Tinting This process can best be accomplished by selecting the sheet metal layer #23 and using the "Hue/Saturation" palette under "Image>Adjustments." If major changes are needed, use the "Colorize" check box. 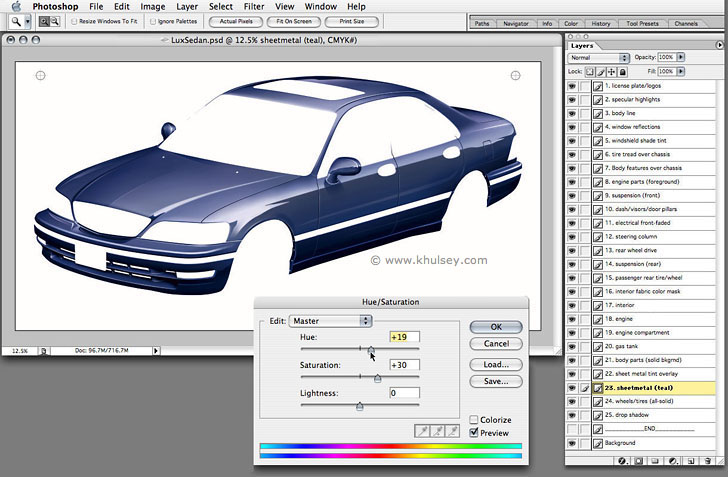 Interior Fabric Re-Tinting Step 1. This step is best accomplished by "Command Clicking" the "Interior Fabric Color Mask" layer #16, then shifting to the "Interior" layer #17. The "Mask" layer #16 is an invisible layer and is for selecting purposes only.  Step 2. Use the "Hue/Saturation" palette to make any adjustments to the fabric color. Again, if major changes are needed, use the "Colorize" check box. If you need to dramatically darken the fabric, duplicate Interior layer #17 and set the copy to "Multiply." Then dial back the "Opacity" of the "Multiply" layer until the desired level is achieved. 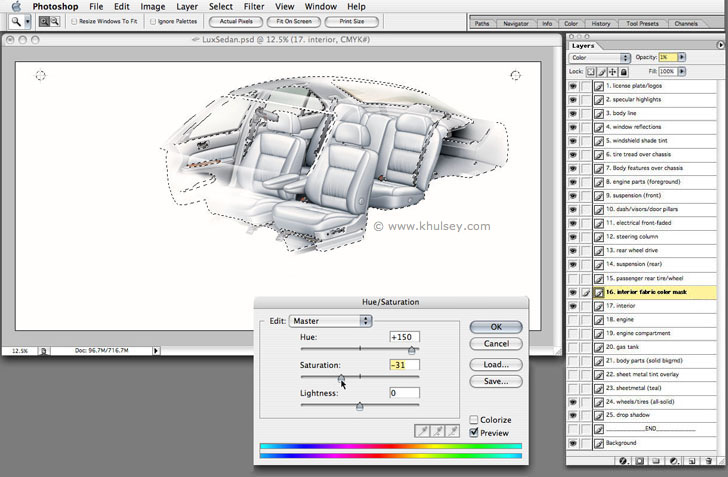 Major Component and Sub-System Layers The sample below shows you the location of certain sub-systems in the layers palette. Please note the additional sheet metal layers (violet) located at the bottom of the layers palette. These extra sheet metal layers are pre-tinted for your convenience, and must be relocated to position #23 before flattening the image. There is also a "Frisket" layer (not shown) if you need to easily select certain areas of the vehicle. 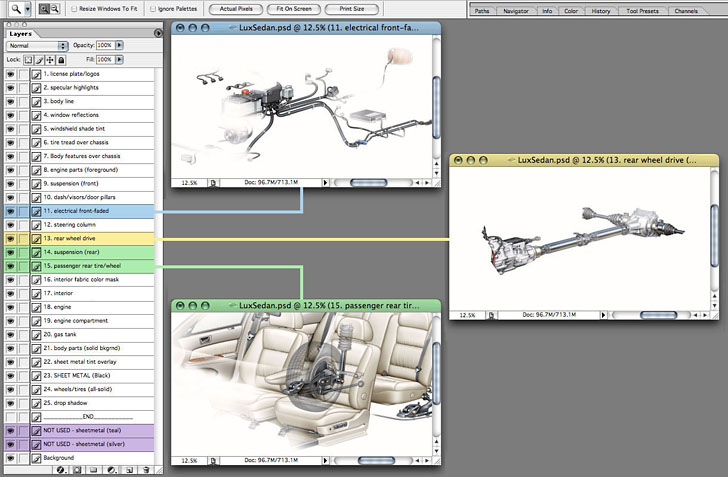 Flattening and Converting File When you are finished making all of your adjustments to the individual layers, it will be time to flatten the image. DO NOT MERGE DOWN LAYERS ONE AT A TIME! Some of the layers are set to "multiply" and some of the layers are set to "Normal." If you merge down a "Multiply" or tint layer to a "Normal" layer, it will no longer function correctly as a "Multiply" layer. The only recommended way to flatten the artwork is to use the "Flatten Image" command located in the layers palette. If you will be converting the file from CMYK to RGB, do so AFTER flattening. 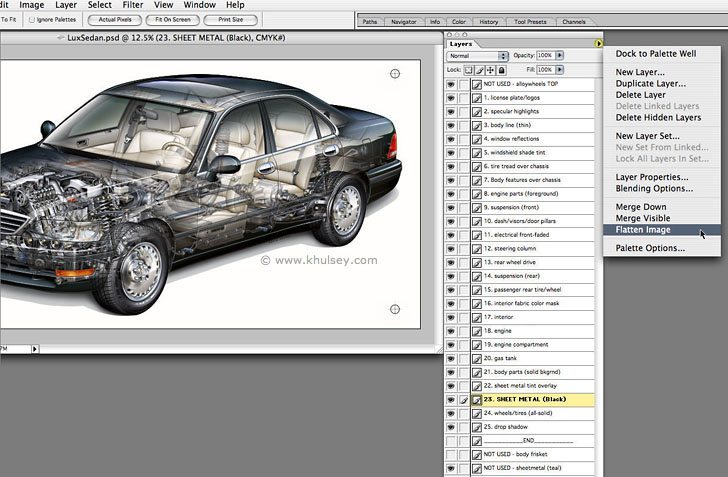 If you have any questions about customizing this image that are not addressed in this document, please call Kevin Hulsey at 831-625-8100. Back to: Car Stock Images Main Portfolio |Automotive Illustration |Line Art Illustration |Car Stock Images |Illustration Tutorials Copyright © 1996-2011 Kevin Hulsey Illustration All rights reserved. |
|